

Is your leather chair looking tired or faded? Imagine giving it a fresh, vibrant new color without buying a whole new piece.
You might think dyeing leather is complicated or messy, but it doesn’t have to be. With the right steps, you can transform your chair and make it look brand new. In this guide, you’ll learn exactly how to dye a leather chair easily and effectively.
Ready to bring your chair back to life? Let’s get started!
Preparing The Leather Surface
Preparing the leather surface is important before dyeing. It helps the dye stick well and look smooth.
Good preparation removes dirt, old finishes, and rough spots on the leather.
Cleaning The Chair Thoroughly
Start by cleaning the leather chair to remove dust and oils. Use a soft cloth and mild soap.
Make sure to clean every part of the chair, including corners and seams. Let it dry fully before the next step.
Removing Old Finish And Stains
Old finishes can block the dye from soaking in. Use a leather finish remover or rubbing alcohol to strip it off.
For stains, apply a leather cleaner or stain remover. Test on a small spot first to avoid damage.
- Apply remover with a soft cloth
- Rub gently in circular motions
- Wipe off residue with a clean cloth
- Let the leather dry completely
Sanding For Better Adhesion
Light sanding helps the dye stick to the leather. Use fine sandpaper made for leather or very smooth surfaces.
Sand gently to avoid damage. Focus on areas with old finish or rough spots. Wipe away dust after sanding.

Credit: angelusdirect.com
Choosing The Right Dye
Choosing the right dye is important for a leather chair. The dye affects the chair’s look and feel. It also helps the leather last longer.
Before you start dyeing, you need to know what types of leather dyes exist. You also should pick a color and finish that match your style. Lastly, gather all tools and materials for the job.
Types Of Leather Dyes
Leather dyes come in different types. Each type works best for certain kinds of leather and results. Choose one that fits your chair and your skill level.
- Aniline Dye:Penetrates leather deeply. Keeps natural look.
- Semianiline Dye:Adds some protection. Slightly glossy finish.
- Pigment Dye:Covers surface. Hides imperfections well.
- Alcohol-Based Dye:Dries fast. Gives rich color.
- Water-Based Dye:Safer to use. Less strong smell.
Selecting Color And Finish
Pick a color that fits your room and style. Think about how bright or dark you want the chair. Also choose a finish that protects the leather and shows its texture.
| Finish Type | Description | Use |
| Matte | Non-shiny, natural look | For a soft, classic style |
| Satin | Smooth with slight shine | For a balanced, elegant look |
| Glossy | Shiny and bright | For a bold, modern style |
| Protective Finish | Seals dye and protects leather | For durability and water resistance |
Tools And Materials Needed
Having the right tools and materials helps you dye the leather chair well. Prepare everything before you start to avoid problems.
- Leather dye in your chosen color and type
- Leather cleaner to prepare the surface
- Soft cloths or sponges for applying dye
- Protective gloves to keep hands clean
- Mask or good ventilation for safety
- Leather finish or sealant
- Sandpaper or leather prep tools if needed
Applying The Dye
Applying dye to a leather chair changes its look and refreshes old surfaces. The process needs care to make the color smooth and even.
Use the right tools and techniques to avoid blotches and streaks. This guide will help you apply dye properly.
Testing On A Small Area
Always test dye on a hidden spot of the chair first. This shows how the leather will react to the dye.
Look for color changes and any damage before you dye the whole chair. Testing helps prevent mistakes.
Techniques For Even Application
Use a soft cloth or sponge to apply the dye. Work in small sections and move in circular motions.
Keep a steady hand and apply thin layers. This stops uneven patches and streaks from forming.
- Apply dye in light, consistent strokes
- Overlap strokes slightly for uniform coverage
- Check your work under good light
Layering For Depth And Richness
Apply several thin dye layers to build color depth. Let each layer dry before adding the next.
This method creates a richer, more natural look. It also helps the dye last longer on the leather.
- Wait 20-30 minutes between layers
- Lightly sand if surface feels rough
- Add layers until desired color is reached
Drying And Setting The Dye
After applying dye to a leather chair, drying and setting the color is important. Proper drying helps the dye last longer and look even.
Taking care during this stage prevents damage and uneven color. Follow the right steps for good results.
Proper Drying Conditions
Dry the leather chair in a room with good air flow. Avoid places with direct sunlight or high humidity. These can cause the dye to dry too fast or unevenly.
Keep the chair away from dust or dirt while drying. A clean space helps the dye stay smooth and bright.
Using Heat To Speed Up Drying
You can use gentle heat to help the dye dry faster. Use a fan or a hair dryer on a low setting. Keep the heat source at least 12 inches away from the leather.
Do not use high heat. It can damage the leather or cause the dye to crack.
- Use a fan for steady air circulation
- Set hair dryer to low heat
- Keep heat source at a safe distance
- Check the leather often for dryness
Avoiding Smudges And Runs
Do not touch the leather while the dye is still wet. Touching can cause smudges or uneven color.
If the chair is moved before the dye dries, the color might run or smear. Keep the chair still until the dye is fully set.
- Keep hands away from wet areas
- Place chair in a safe, undisturbed spot
- Avoid stacking or covering the leather
- Wait at least 24 hours before use
Finishing Touches
Dyeing a leather chair changes its look. The final steps help keep it fresh and protected.
These finishing touches improve the chair's feel and make the color last longer.
Applying Leather Conditioner
Leather conditioner softens the leather after dyeing. It stops the leather from drying out.
Use a soft cloth to apply a thin layer of conditioner evenly over the chair.
- Choose a conditioner made for dyed leather
- Apply gently in small circular motions
- Let it absorb for at least 30 minutes
- Wipe off any extra conditioner with a dry cloth
Sealing With A Protective Coat
A protective coat keeps the dye from rubbing off. It also guards against stains and water.
Use a clear leather sealer spray or cream. Apply it in a well-ventilated room.
- Test the sealer on a hidden spot first
- Apply a thin, even layer over the entire chair
- Allow it to dry fully before use
- Reapply every few months for best protection
Maintaining The New Color
Keep the leather chair looking good by cleaning it regularly. Avoid harsh chemicals.
Use a soft cloth or brush to remove dust. Apply conditioner every few months.
- Place the chair away from direct sunlight
- Clean spills immediately to prevent stains
- Use mild soap and water for dirt
- Condition leather 3 to 4 times a year
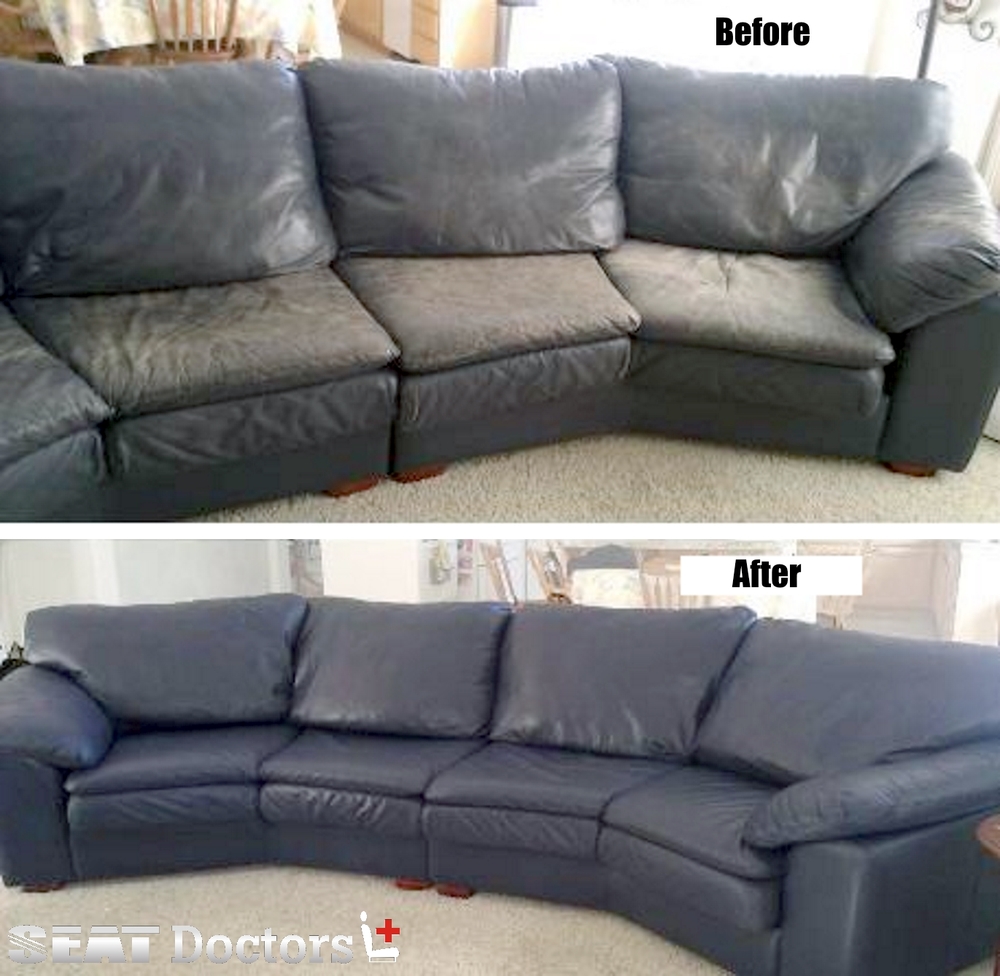
Credit: www.seatdoctors.com
Common Mistakes To Avoid
Dyeing a leather chair can refresh its look. It takes care and attention to do it well.
Some errors can cause poor results or damage. Learn the common mistakes to avoid them.
Skipping Surface Prep
Not cleaning or sanding the leather first can stop the dye from sticking. Dirt and oils block the color. Preparing the surface helps the dye soak in evenly.
- Clean the leather with a gentle cleaner.
- Remove all dust and grime.
- Lightly sand rough spots.
- Let the chair dry fully before dyeing.
Using Wrong Dye Types
Leather needs special dyes made for it. Using paint or fabric dye can crack or peel. Always pick a dye designed for leather surfaces.
| Dye Type | Best For | Why |
| Leather Dye | Leather Chairs | Penetrates and flexes with leather |
| Fabric Dye | Cloth Materials | Does not bond well with leather |
| Acrylic Paint | Art Projects | Can crack on leather |
Overapplying The Dye
Applying too much dye can cause streaks and uneven color. It can also make the leather sticky or stiff. Use thin, even coats and let each dry before adding more.
Tips to avoid overapplying:
- Apply in thin layers
- Use a sponge or cloth for control
- Wait 15-30 minutes between coats
- Test dye on a small hidden spot first

Credit: www.youtube.com
Frequently Asked Questions
Can I Dye A Leather Chair At Home?
Yes, you can dye a leather chair at home. Start by cleaning the leather thoroughly. Use a leather cleaner to remove dirt and oils. Then, apply a suitable leather dye evenly. Follow the manufacturer's instructions for the best results. Allow the chair to dry completely before use.
What Materials Do I Need To Dye Leather?
To dye leather, you'll need leather dye, a leather cleaner, and a sponge or brush. You should also have gloves and a drop cloth. These materials help ensure a smooth dyeing process and protect your surroundings. Always follow the instructions on the dye product for best results.
How Long Does Leather Dye Take To Dry?
Leather dye typically takes 24 to 48 hours to dry completely. Drying time can vary based on humidity and temperature. Ensure the chair is placed in a well-ventilated area. Avoid using the chair until the dye is fully dry to prevent damage or smudging.
Will Dyeing Affect Leather's Texture?
Dyeing can slightly alter the leather's texture, making it feel stiffer. However, using a leather conditioner post-dyeing can help restore softness. Ensure you apply the conditioner evenly. Regular maintenance will help maintain the leather’s natural feel and prevent drying or cracking.
Conclusion
Dyeing a leather chair can refresh its look and feel. Clean the chair well before starting the dye process. Apply the dye evenly and allow it to dry completely. Take your time to avoid mistakes and uneven color. With patience, you can give your chair a new life.
Enjoy the satisfaction of your handiwork and a beautiful leather chair. Simple steps lead to great results. Try it yourself and see the difference.


