
Are you ready to brighten up your bathroom with a new vanity light fixture? Installing one might seem tricky, but with the right steps, you can do it yourself quickly and safely.
Imagine stepping into a well-lit space that highlights your best features every morning. In this guide, you’ll find simple, clear instructions that make the process easy—even if you’re not an expert. Keep reading to learn exactly how to install your vanity light fixture and transform your space with confidence.

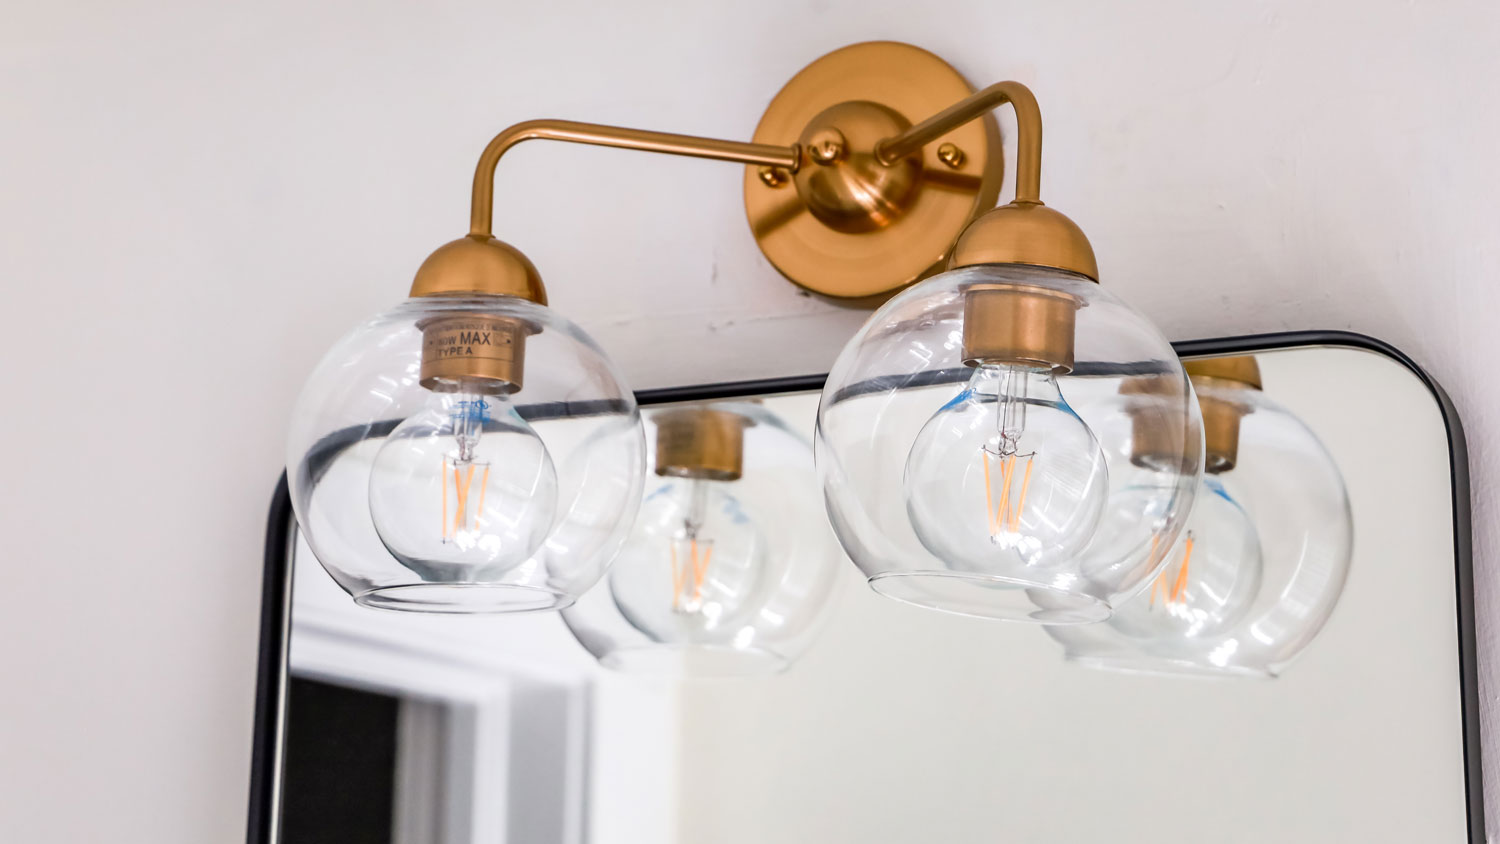
Credit: diy.stackexchange.com
Tools And Materials Needed
Installing a vanity light fixture needs the right tools and materials. Having these ready makes the job easier and safer.
Before starting, gather everything you need. This helps you avoid delays and keeps your work smooth.
Screwdrivers
Screwdrivers are needed to remove the old fixture and attach the new one. Both flat-head and Phillips screwdrivers are useful.
- Flat-head screwdriver for slotted screws
- Phillips screwdriver for crosshead screws
Voltage Tester
A voltage tester checks if the power is off. This tool helps keep you safe from electrical shocks while working.
Wire Strippers
Wire strippers remove the insulation from electrical wires. This tool makes it easy to connect wires securely.
- Choose wire strippers matching your wire size
- Look for a comfortable grip for better control
Electrical Tape
Electrical tape insulates and protects wire connections. It helps prevent short circuits and keeps connections safe.
Wire Nuts
Wire nuts secure the wires together after connecting them. They come in different sizes for various wire gauges.
- Match wire nut size to wire gauge
- Twist wires tightly before placing wire nuts
Mounting Hardware
Mounting hardware holds the vanity light fixture in place. This usually includes screws, brackets, and anchors.
- Screws to attach the fixture to the wall
- Brackets to support the fixture's weight
- Anchors if mounting on drywall without studs
Vanity Light Fixture
Choose a vanity light fixture that fits your space and style. Make sure it matches your electrical setup.
Check the fixture’s instructions for any special materials or tools needed.
Ladder Or Step Stool
A ladder or step stool helps reach the installation area safely. Use one that is stable and the right height.
Safety Gear
Safety gear protects you during the installation. Gloves and safety glasses are recommended.
- Insulated gloves protect from shocks
- Safety glasses protect eyes from dust and debris
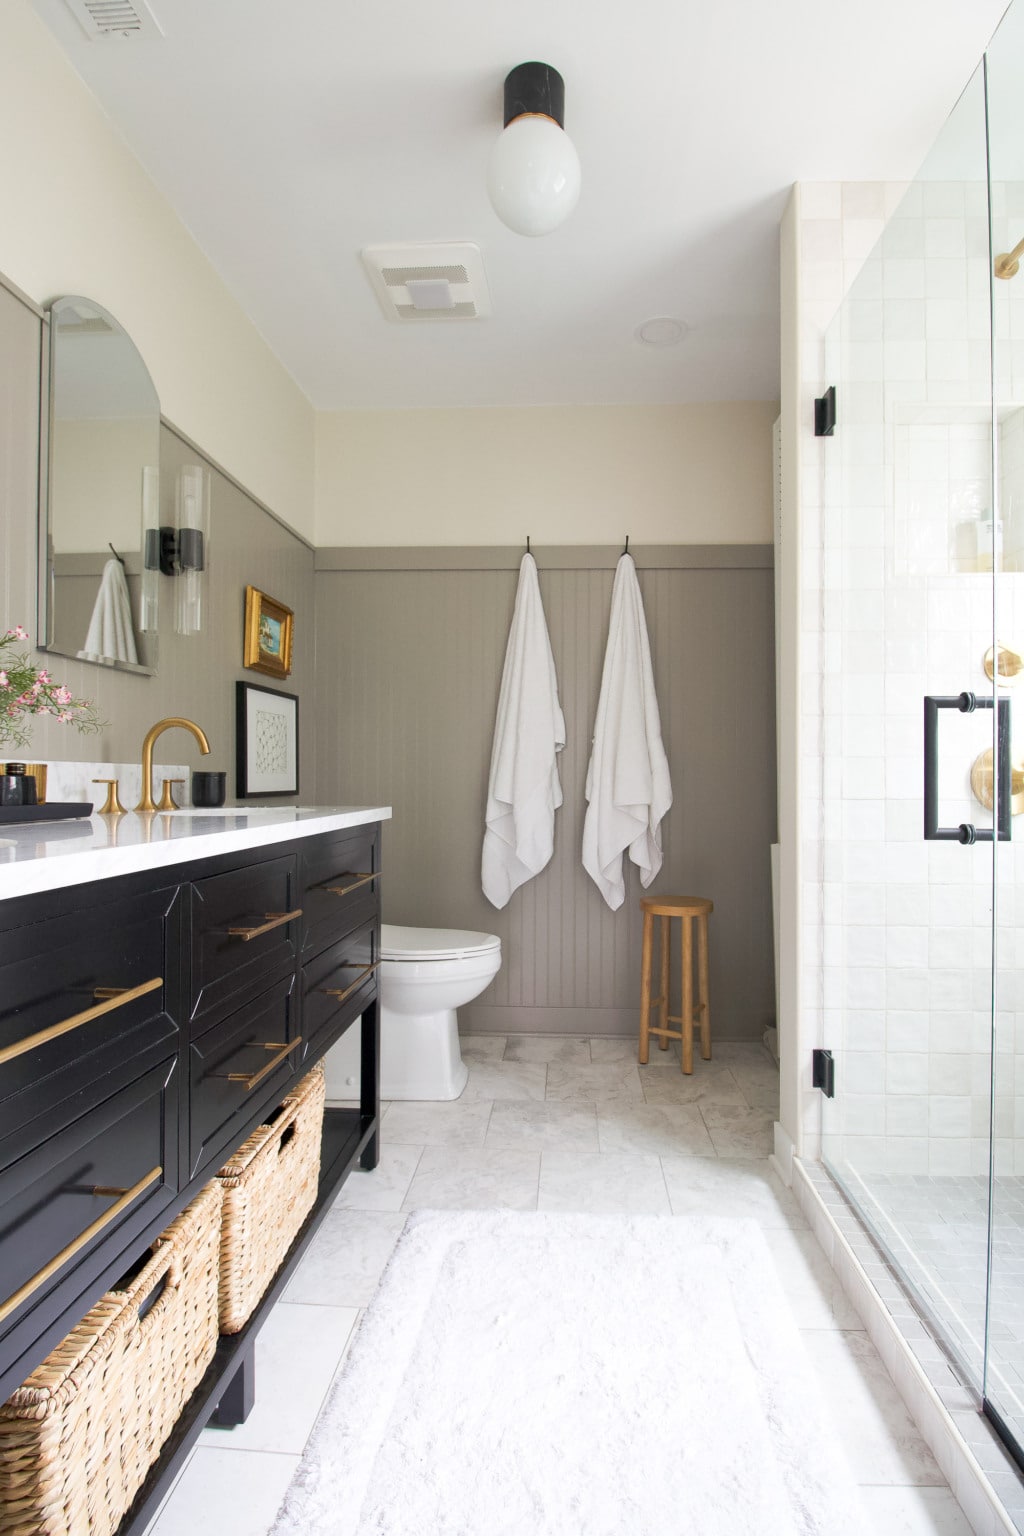
Credit: www.angi.com
Turn Off Power Safely
Before installing a vanity light fixture, you must turn off the power. This step keeps you safe from electric shocks.
Always check twice to make sure the power is off. Safety is the most important part of this job.
Locate The Circuit Breaker
Find your home's circuit breaker panel. It is usually in the basement, garage, or utility room.
Look for the breaker that controls the light fixture's power. It may be labeled with the room name.
Switch Off The Breaker
Flip the circuit breaker to the "off" position. This stops electricity from flowing to the fixture.
Do not guess if the breaker is off. Always confirm with a tester before touching wires.
Use A Voltage Tester
Use a non-contact voltage tester near the wires. It shows if electricity is still running.
Test all wires connected to the vanity light fixture. If the tester shows no power, it is safe to continue.
- Hold the tester close to each wire
- Look for lights or sounds from the tester
- If the tester stays silent, power is off
Remove Old Light Fixture
Removing an old light fixture is the first step to install a new vanity light fixture. It helps prepare the space and wiring for the new installation.
Take your time to remove the old fixture carefully. This protects the wiring and wall surface for the new light.
Turn Off The Power
Always switch off the power at the circuit breaker before working on any light fixture. This keeps you safe from electric shock.
Use a voltage tester to check if the wires are still live. Do not touch wires if the power is on.
- Find the correct circuit breaker for the light
- Switch off the breaker
- Test wires with a voltage tester
Remove Light Bulbs And Shades
Take out all light bulbs and any decorative shades. This makes the fixture lighter and easier to handle.
Place bulbs in a safe spot to avoid breakage. Keep the shades if you plan to reuse them.
Unscrew The Fixture
Use a screwdriver to remove the screws holding the fixture to the wall. Support the fixture with your hand as you unscrew.
Once loose, gently pull the fixture away from the wall to expose the wiring behind it.
Disconnect The Wiring
Unscrew the wire connectors to separate the fixture wires from the home wiring. Remember which wires connect together.
- Black or red wires are usually hot
- White wires are neutral
- Green or bare wires are ground
After disconnecting, carefully remove the fixture completely. Do not pull on the wires.
Remove Mounting Bracket
Unscrew the mounting bracket from the electrical box if your new fixture does not use the old one. Keep screws safe for reuse.
Make sure the electrical box is secure before installing the new vanity light fixture.
Credit: thediyplaybook.com
Inspect And Prepare Wiring
Before installing a vanity light fixture, check the wiring carefully. Proper inspection ensures safety and good connection.
Preparing the wiring correctly helps the light work well and last a long time.
Turn Off Power At The Circuit Breaker
Always switch off power before handling any electrical wiring. This prevents electric shock and accidents.
Use a voltage tester to confirm the power is off at the wires you will work on.
Remove Old Fixture And Check Existing Wiring
Take down the old vanity light carefully. Inspect the wires for damage or wear.
- Look for cracks in wire insulation
- Check for loose or exposed wires
- Note the wire colors and connections
Prepare The Wiring For The New Fixture
Strip about half an inch of insulation from each wire end. This helps make a solid connection.
Twist the wire strands tightly so they do not fray. Use wire nuts to secure the connections safely.
- Use wire strippers to remove insulation cleanly
- Match wire colors: black to black, white to white, ground to ground
- Secure connections with wire nuts and electrical tape
Check The Electrical Box And Mounting Hardware
Inspect the electrical box where the fixture will mount. It should be secure and support the fixture's weight.
Replace any damaged mounting brackets or boxes before installing the new light.
Mount The Vanity Light Bracket
Mounting the vanity light bracket is a key step in installing your new light fixture. It provides support and holds the light firmly on the wall.
Follow the instructions carefully to ensure the bracket is secure and level before attaching the light fixture.
Turn Off The Power
Before starting, switch off the power at the circuit breaker. This prevents electric shock while working.
Double-check that the light switch does not turn the power back on accidentally.
Remove The Old Fixture
Unscrew and carefully remove the old light fixture from the wall. Keep the screws and mounting hardware.
Disconnect the wires by loosening the wire nuts. Pull the fixture away from the wall.
Attach The Bracket To The Electrical Box
Align the vanity light bracket with the holes on the electrical box in the wall.
Use screws to fasten the bracket firmly to the box. Make sure it is tight and does not move.
- Check that the bracket sits flat against the wall
- Use a level to keep the bracket straight
- Tighten screws evenly to avoid tilting
Check The Bracket Stability
Gently shake the bracket to make sure it does not wobble or shift.
If it moves, tighten the screws more or reposition the bracket for a secure fit.
Connect The Wiring
Connecting the wiring is a key part of installing a vanity light fixture. You must handle wires safely and correctly to avoid problems.
Follow these steps to connect the wiring properly and ensure your light works well.
Match Wire Colors
Look at the wires from your wall and the light fixture. Each wire has a color that shows its purpose.
Usually, black or red wires are hot, white wires are neutral, and green or bare wires are ground.
- Connect black (hot) wire to black wire
- Connect white (neutral) wire to white wire
- Connect green or bare (ground) wire to ground wire
Secure Wire Connections
After matching the wires, twist them together tightly. Use wire nuts to cover the joined wires.
Make sure no copper is showing outside the wire nut. This keeps the connection safe and strong.
- Twist wires firmly together
- Place wire nut over wires
- Twist wire nut until tight
- Check that wires do not pull out
Attach The Vanity Light Fixture
Attaching a vanity light fixture is an important step in bathroom lighting. It adds style and brightens the space above your mirror.
This guide shows simple ways to secure the fixture safely and correctly.
Turn Off The Power
Before starting, switch off the power at the circuit breaker. This stops electric shock risks.
Use a voltage tester to confirm the wires have no power.
Prepare The Mounting Bracket
Most fixtures come with a mounting bracket. Attach this bracket to the electrical box using screws.
Make sure the bracket is level and tight for proper support.
Connect The Wires
Match the fixture wires to the house wires by color. Usually, black to black, white to white, and green or bare wire to ground.
Use wire nuts to twist the wires together and wrap them with electrical tape for safety.
Attach The Fixture To The Bracket
Hold the vanity light fixture close to the mounting bracket. Align the screw holes on the fixture with the bracket.
- Insert screws through the fixture holes into the bracket
- Tighten screws evenly to secure the fixture
- Do not overtighten to avoid damage
The fixture should sit flush against the wall without gaps.
Install Light Bulbs And Cover
Insert the correct type and wattage of bulbs into the sockets. Check the fixture label for details.
Attach any glass covers or shades that came with the fixture. Secure them properly.
Install Light Bulbs
Installing light bulbs in a vanity light fixture is an easy task. It helps brighten your bathroom or dressing area.
Follow simple steps to put the bulbs in safely and correctly.
Turn Off The Power
Before handling the bulbs, switch off the power at the wall or circuit breaker. This stops any electric shock.
Make sure the light switch is also off to avoid accidents.
Remove Old Bulbs Carefully
Let old bulbs cool down if they were on. Touching hot bulbs can cause burns.
Gently twist or pull old bulbs out, depending on the fixture type.
Select Correct Bulbs
Check the fixture label for the right bulb type and wattage. Using wrong bulbs can damage the fixture.
- Use bulbs with correct base size
- Match wattage to fixture limits
- Choose bulbs with proper brightness and color
Insert New Bulbs Gently
Hold the bulb by its base or edges. Avoid touching the glass part with your fingers.
Align the bulb base with the socket and gently push or twist until secure.
Check Bulb Installation
Make sure each bulb is snug and straight in the socket. Loose bulbs can flicker or fall out.
Wipe the bulbs with a clean cloth to remove fingerprints or dust for better light.
Turn Power Back On
Switch the power back on at the breaker or wall switch. Test the bulbs by turning on the light.
If bulbs do not light up, check installation and power source again.
Restore Power And Test
After installing your vanity light fixture, you need to restore power safely. This step lets you check if the fixture works correctly.
Testing ensures the wiring is correct and the light operates as expected. Follow simple steps to avoid risks.
Turn The Circuit Breaker Back On
Find the circuit breaker that controls the vanity light. Flip it to the ON position to restore power.
If you are unsure which breaker to use, turn on the main power switch. Use caution and avoid touching wires.
Switch On The Vanity Light
Use the wall switch to turn on your new vanity light fixture. Check if the light bulb lights up.
If the light does not turn on, turn the power off again. Double-check all connections and wiring.
Test For Proper Operation
Turn the light on and off several times. Make sure it works smoothly without flickering or buzzing.
Check for loose parts or unusual sounds. Tighten screws if needed and replace bulbs that do not work.
Use A Voltage Tester For Safety
Use a voltage tester to confirm there is power at the fixture. This tool helps ensure safe and correct wiring.
- Touch the tester to the wires or terminals
- Look for a light or beep indicating power
- If no power is detected, check the breaker and connections
Troubleshooting Tips
Installing a vanity light fixture is usually easy. Sometimes, small problems can stop the fixture from working right.
These tips help you find and fix common issues when installing your vanity light.
Light Does Not Turn On
If your vanity light does not turn on, check the power source first. Make sure the circuit breaker is on and the switch works.
Also, check the bulb. It might be loose or burned out. Replace the bulb if needed.
- Check if the circuit breaker is switched on
- Test the wall switch for proper function
- Make sure the bulb is screwed in tightly
- Replace the bulb if it looks dark or broken
Light Flickers Or Flashes
Flickering lights may mean a loose wire connection. Turn off the power before checking the wires.
Tighten all wire nuts and screws. Also, check if the bulb is compatible with the fixture.
- Turn off power at the breaker
- Secure all wire connections firmly
- Use the correct bulb type and wattage
- Replace damaged wiring if found
Fixture Feels Loose Or Wobbly
A loose fixture can be unsafe. Check that the mounting bracket is tight against the wall.
Use the screws that came with the fixture. If the wall anchors are weak, use stronger anchors or toggle bolts.
- Ensure mounting bracket is flush with the wall
- Tighten all screws firmly
- Replace weak wall anchors if needed
- Use toggle bolts for drywall installation
Light Fixture Makes Noise
If the fixture buzzes or hums, it may be due to the bulb or wiring. Try replacing the bulb with a new one.
Check if the dimmer switch is compatible with your bulbs. Some bulbs do not work well with dimmers.
- Replace the bulb to test for noise
- Use bulbs compatible with dimmer switches
- Check wiring for loose connections
- Replace faulty dimmer switches if needed
Light Fixture Overheats
Overheating can be dangerous. Check the bulb wattage and never exceed the maximum rating for the fixture.
Make sure the fixture has enough space around it for air to flow. Avoid enclosing it in tight spaces.
- Use bulbs within the fixture’s wattage limit
- Allow space around the fixture for ventilation
- Do not cover the fixture with insulation
- Replace bulbs that feel hot quickly
Frequently Asked Questions
How Do I Prepare For Installing A Vanity Light Fixture?
Start by turning off the power at the circuit breaker. Gather tools like a screwdriver, wire stripper, and voltage tester. Remove the old fixture carefully, and check the electrical box is secure and compatible with the new vanity light fixture.
What Safety Precautions Should I Follow During Installation?
Always switch off the main power before starting. Use a voltage tester to ensure no electricity flows. Wear safety goggles and gloves. Avoid working in wet areas to prevent electric shocks.
Can I Install A Vanity Light Fixture Myself?
Yes, with basic electrical knowledge and proper tools, you can install it yourself. Follow the manufacturer’s instructions carefully. If unsure, consult a professional electrician to ensure safety and code compliance.
How Do I Connect Wires For A Vanity Light Fixture?
Match the fixture wires to the house wires by color: black to black, white to white, and green or copper to ground. Use wire nuts to secure connections and wrap with electrical tape for extra safety.
Conclusion
Installing a vanity light fixture can brighten any bathroom space. Follow each step with care to ensure safety and success. Double-check all connections before turning the power back on. A well-installed fixture adds both style and function. Take your time and enjoy the new look you create.
This small upgrade can improve your daily routine. Now, your bathroom lighting works just the way you want. Simple tasks like this boost confidence in home projects. You’ve got this!


