Are you looking to give your coffee table a fresh new look without spending a fortune? Painting your coffee table is a simple and rewarding way to transform your space.
Imagine turning a dull, worn-out piece into a stunning centerpiece that reflects your style. In this guide, you’ll discover easy steps and smart tips that make painting your coffee table a fun and successful project. Ready to create something beautiful with your own hands?
Keep reading, and you’ll have all the tools you need to start today.
Choosing The Right Paint
Painting a coffee table can change its look and protect the wood. Choosing the right paint is very important. The paint must stick well and look nice.
Not all paints work the same on wood. Some paints last longer and some show the wood grain better. Learn about paint types and colors to get the best result.
Types Of Paint For Wood
There are many paint types for wood furniture. Each type has different uses and finishes. Pick paint that is made for furniture and wood surfaces.
- Latex Paint:Water-based and easy to clean. It dries fast and has low odor.
- Chalk Paint:Gives a matte, vintage look. It needs a sealant to protect the surface.
- Oil-Based Paint:Strong and durable. It takes longer to dry and needs good ventilation.
- Acrylic Paint:Water-based and flexible. It resists cracking and works well for indoor tables.
- Milk Paint:Natural and non-toxic. It creates a rustic or antique finish.
Selecting Colors And Finishes
Pick colors that match your room and style. Light colors make rooms feel bigger. Dark colors add warmth and richness.
Finishes change how the paint looks and feels. Glossy finishes shine and show imperfections. Matte finishes hide flaws but look flat.
- Glossy Finish:Shiny and easy to clean. Best for high-use tables.
- Satin Finish:Soft shine and smooth feel. It hides small scratches well.
- Matte Finish:No shine and natural look. Good for rustic or modern styles.
- Eggshell Finish:Slight shine and good durability. It looks like soft eggshell.

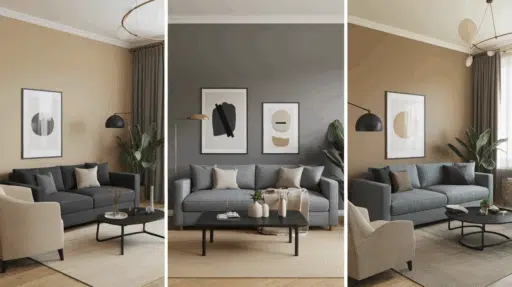
Credit: www.ajsvintagedesigns.com
Preparing The Coffee Table
Preparing your coffee table is key before you start painting. It helps the paint stick well and last longer.
Cleaning and fixing the table makes the surface smooth and ready for paint. This guide shows how to prepare it right.
Cleaning And Sanding
Start by cleaning the coffee table to remove dust and dirt. Use a damp cloth and mild soap. Let it dry fully.
Next, sand the surface to make it smooth. Use fine-grit sandpaper and sand in a circular motion. This helps paint stick better.
- Wipe off dust after sanding
- Smooth edges and corners carefully
- Sand any glossy areas to dull them
Repairing Imperfections
Check the table for cracks, holes, or dents. Fix these with wood filler or putty. Let it dry completely.
After drying, sand the repaired spots until they are smooth and even with the rest of the surface.
- Use a putty knife to apply wood filler
- Fill cracks and holes fully
- Sand repaired areas gently after drying
Priming The Surface
Priming a coffee table is an important step before painting. It helps the paint stick better and last longer.
Priming also protects the table from stains and damage. It makes the finish look smooth and even.
Benefits Of Priming
Primer creates a strong base for your paint. It stops stains and knots from showing through the paint.
Priming helps the paint dry faster and prevents peeling or cracking. It also improves the paint’s color.
- Improves paint adhesion
- Prevents stains and wood tannins
- Creates a smooth surface
- Increases paint durability
- Enhances color brightness
How To Apply Primer
Start by cleaning the table to remove dirt and grease. Sand the surface lightly to make it smooth.
Use a brush or roller to apply a thin, even layer of primer. Let it dry completely before painting.
- Clean the table surface well
- Sand gently with fine-grit sandpaper
- Apply primer in thin, even coats
- Allow primer to dry fully
- Sand lightly after drying for smooth finish
Painting Techniques
Painting a coffee table can change its look and feel. Using the right techniques helps make the paint smooth and long-lasting.
Choosing how to apply paint affects the final result. Let’s explore two common ways to paint and tips for even coats.
Brush Vs. Spray Painting
Brush painting uses a paintbrush to apply paint. It gives good control and works well for small or detailed areas.
Spray painting uses a spray gun or aerosol can. It covers large areas quickly and creates a smooth finish without brush marks.
- Brush painting is easy for beginners and small projects
- Spray painting is faster for big surfaces
- Brush painting may leave streaks if not careful
- Spray painting needs a well-ventilated area
Applying Even Coats
Applying paint in thin, even coats helps avoid drips and uneven color. Thick coats take longer to dry and can peel.
Let each coat dry fully before adding the next. Light sanding between coats improves paint adhesion and smoothness.
- Use long, smooth strokes with a brush
- Keep the spray can or gun moving constantly
- Apply several thin layers instead of one thick layer
- Sand lightly between coats for the best finish
Adding Protective Finishes
After painting your coffee table, add a protective finish. This keeps the paint safe from spills and scratches.
Protective finishes make your table last longer. They also give a nice shine or matte look.
Choosing A Sealer
A sealer protects the paint underneath. It stops moisture and dirt from causing damage.
Pick a sealer that works with your paint type. Some sealers dry clear and do not change color.
- Water-based sealers dry fast and have low odor
- Oil-based sealers give a strong, durable finish
- Polyurethane sealers are good for heavy use
- Shellac sealers dry quickly but are less water-resistant
Applying The Topcoat
After sealing, apply a topcoat to add extra protection. Topcoats can be glossy or matte.
Use a clean brush or foam applicator. Apply thin, even layers and let each dry fully before the next.
- Lightly sand between coats for smoothness
- Apply 2-3 coats for best protection
- Work in a dust-free area to avoid particles
- Follow the product instructions for drying times
Creative Design Ideas
Painting a coffee table is a fun way to refresh your space. You can use many creative ideas to make it unique.
Try different techniques to add style and personality to your table. This guide covers two popular design ideas.
Stenciling And Patterns
Stenciling adds shapes and designs to your coffee table. You can create patterns with paint and stencils.
Use geometric shapes, flowers, or custom designs to make your table stand out. Patterns give a fresh, artistic look.
- Choose a stencil design that fits your room style
- Apply base paint and let it dry completely
- Place the stencil and use a sponge to dab paint
- Remove stencil carefully to avoid smudges
- Repeat the pattern for a full design or just a corner
Distressing And Antiquing
Distressing makes your coffee table look old and worn. It adds character and a vintage feel to the furniture.
Antiquing uses dark paint or glaze to create an aged look. It highlights details and edges for a classic style.
- Start with sanding to roughen the surface slightly
- Paint the table with your chosen color and dry fully
- Use sandpaper on edges and flat spots for wear marks
- Apply antique glaze or dark wax in crevices
- Wipe off excess glaze to keep a natural look
Maintenance Tips
Painting a coffee table gives it a fresh new look. Proper care helps keep the paint bright and smooth.
Regular maintenance stops damage and makes your table last longer. Follow these tips to keep it looking great.
Cleaning Painted Surfaces
Clean your painted coffee table gently to avoid scratches. Use a soft cloth and mild soap with water.
Avoid harsh chemicals or rough sponges. Wipe spills quickly to stop stains from setting.
- Use a soft, damp cloth for dust and dirt
- Add a few drops of mild soap to water for cleaning
- Do not scrub hard or use abrasive cleaners
- Dry the surface with a clean, soft towel
- Clean spills right away to prevent damage
Touching Up Chips And Scratches
Small chips and scratches can happen over time. Fix them to keep your table looking neat.
Use matching paint to cover the damaged areas. Lightly sand the spot before painting for better hold.
- Clean the chipped area before repair
- Lightly sand the spot with fine sandpaper
- Apply matching paint with a small brush
- Let the paint dry completely
- Apply a clear coat to protect the repair if needed

Credit: www.youtube.com

Credit: www.youtube.com
Frequently Asked Questions
What Materials Are Needed To Paint A Coffee Table?
To paint a coffee table, you'll need sandpaper, primer, paint, and a paintbrush or roller. Consider using a drop cloth to protect surfaces. A sealer can provide additional durability. Ensure you choose a paint suitable for wood or the specific material of your table.
How Do I Prepare The Table For Painting?
Start by cleaning the table to remove dust and grime. Sand the surface to create a smooth, even texture. Apply a primer to help the paint adhere better. Ensure the primer dries completely before you begin painting. This preparation ensures a lasting finish.
Can I Paint Over A Varnished Table?
Yes, you can paint over a varnished table. First, sand the surface lightly to remove the gloss and ensure better adhesion. Apply a quality primer designed for glossy surfaces. Once the primer is dry, proceed with your chosen paint. Ensure each layer is completely dry before applying the next.
How Long Does The Paint Take To Dry?
The drying time for paint depends on the type used. Typically, latex paint dries to the touch in about an hour. However, it's best to wait 24 hours before using the table. Oil-based paints may take longer to dry. Always check the manufacturer's recommendations for specific drying times.
Conclusion
Painting a coffee table can refresh any room quickly. Choose the right paint and tools for best results. Clean and sand the table well before painting. Apply thin, even coats and let each dry fully. Patience makes the finish smooth and long-lasting.
Enjoy your new, personalized piece that suits your style. Small projects like this bring big changes at home. Give it a try and see the difference yourself.