Have you ever wondered how your headboard stays firmly in place on your bed frame? If you’re setting up a new bed or thinking about upgrading your bedroom, understanding how a headboard attaches to a bed frame can save you time and frustration.
You’ll discover simple methods that make the process smooth and secure, even if you’re not a DIY expert. Keep reading to find out the easy steps and tips that will help you connect your headboard perfectly, so your bed looks great and feels stable every night.
Types Of Headboard Attachments
Headboards add style and comfort to beds. They come in different types based on how they attach to the bed frame.
Knowing the types helps you choose the right headboard for your bed and room setup.
Bolt-on Headboards
Bolt-on headboards attach directly to the bed frame using bolts and screws. This type is strong and stable.
You usually need tools like a wrench or screwdriver to fix the headboard in place. It fits most metal and wooden frames.
- Requires drilling holes or using existing ones
- Provides firm and secure attachment
- Works well with standard bed frames
- Easy to remove with tools
Hook-on Headboards
Hook-on headboards hang on the bed frame with hooks or brackets. They do not need bolts or screws.
This type is easy to install and remove. It fits frames with side rails that allow hooks to catch.
- No tools needed for installation
- Hooks fit over bed frame rails
- Good for quick setup or temporary use
- May not be as stable as bolt-on
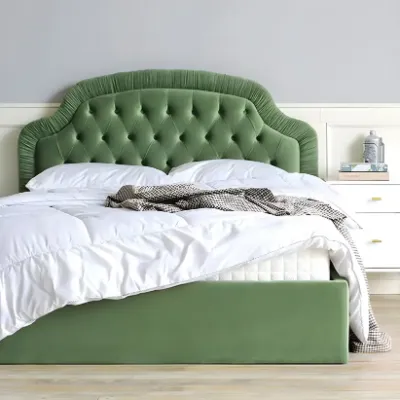
Floor-standing Headboards
Floor-standing headboards do not attach to the bed frame. They stand on the floor behind the bed.
This design lets you place the headboard anywhere. It works well with beds that have no frame or unusual shapes.
- Stands on its own without frame attachment
- Moves easily with the bed
- Can be heavier and larger
- Good for platform beds or futons
Wall-mounted Headboards
Wall-mounted headboards attach directly to the wall behind the bed. They do not connect to the bed frame.
This option saves floor space and allows creative placement. You must use proper wall anchors for safety.
- Mounts on the wall using screws and anchors
- Does not move with the bed
- Allows unique designs and heights
- Needs strong wall support
Tools Needed For Installation
Attaching a headboard to a bed frame requires some basic tools. These tools help make the process easier and safer. Knowing what you need will save time and effort.
Different tools serve different purposes. Some are manual, and some use power. Safety tools protect you during the installation.
Basic Hand Tools
Basic hand tools help with measuring, tightening, and holding parts in place. These tools are usually enough for most headboard installations.
- Screwdriver: For driving screws into the bed frame and headboard.
- Wrench or Adjustable Spanner: To tighten bolts and nuts securely.
- Measuring Tape: To ensure proper alignment and fit.
- Hammer: Useful for tapping parts gently into place.
- Pencil: For marking drilling spots or alignment points.
Power Tools
Power tools make the installation faster and less tiring. They are helpful if the headboard has many screws or bolts.
- Electric Drill: For drilling holes and driving screws quickly.
- Impact Driver: Provides extra power for tough bolts or screws.
- Socket Wrench Set: For tightening bolts with less effort.
Safety Equipment
Safety equipment protects you from injuries during installation. It is important to use them every time you work with tools.
- Safety Glasses: Protect your eyes from dust and debris.
- Work Gloves: Prevent cuts and improve grip on tools.
- Dust Mask: Keeps dust away from your nose and mouth.
- Ear Protection: Use if you work with loud power tools.
Preparing The Bed Frame And Headboard
Attaching a headboard to a bed frame starts with proper preparation. You need to get both parts ready to fit together well.
This process helps avoid problems and makes the assembly easier and safer.
Checking Compatibility
Not all headboards and bed frames fit each other. Check if the parts match before you start.
Look at the size and type of the bed frame and the headboard’s mounting points. Make sure they line up.
- Measure the width of the bed frame and headboard
- Check if bolt holes on the headboard match the frame
- Confirm the bed frame type (metal or wood)
- Review the hardware needed for attachment
Cleaning And Aligning Parts
Clean the bed frame and headboard before attaching. Remove dust and dirt for better contact.
Align the parts carefully. Make sure bolt holes line up and the headboard sits straight against the frame.
- Use a cloth to wipe both parts clean
- Check for any damage or loose screws
- Place the headboard against the frame evenly
- Adjust the position to match bolt holes

Credit: www.youtube.com
Step-by-step Attachment Process
Attaching a headboard to a bed frame is an easy task. It only takes a few tools and some patience. This guide will help you connect your headboard safely and securely.
Follow each step carefully. This will ensure your headboard stays in place and looks good.
Positioning The Headboard
Place the headboard against the wall where the bed will go. Align it with the bed frame's head end. Make sure it is centered and straight.
Check the height of the headboard. It should be at a comfortable level for sitting up in bed. Adjust if needed before attaching.
Securing Bolts And Screws
Find the holes on the bed frame and headboard for bolts or screws. These holes must match up. Line them up carefully.
Insert bolts or screws through the holes. Use washers if provided. This helps spread the pressure and hold parts firmly.
- Insert bolt through the bed frame hole
- Pass bolt through the headboard hole
- Add washer and secure with nut or screw
Tightening And Adjusting
Use a wrench or screwdriver to tighten all bolts and screws. Do not overtighten to avoid damage. Tighten just enough to hold firmly.
Check the headboard's position once more. Adjust if it is not straight or centered. Tighten again after adjustment to keep it stable.
Common Problems And Fixes
Attaching a headboard to a bed frame can sometimes cause problems. Knowing the common issues helps you fix them fast.
This guide covers three common problems: loose headboards, misaligned holes, and damaged frames or hardware.
Loose Headboard
A loose headboard wobbles or moves when you touch it. This happens if bolts are not tight or missing.
To fix a loose headboard, check all screws and bolts. Tighten them with a wrench or screwdriver.
- Find the bolts connecting the headboard to the frame
- Tighten each bolt firmly but do not over-tighten
- Replace any missing bolts with the correct size
- Use washers for extra grip if needed
Misaligned Holes
Misaligned holes make it hard to attach the headboard. The holes on the frame and headboard do not match.
Fix this by measuring the holes and adjusting the headboard or frame. You can also drill new holes if needed.
- Measure the distance between holes on both parts
- Mark new spots on the headboard or frame if needed
- Use a drill carefully to make new holes
- Test fit before tightening bolts
Damaged Frame Or Hardware
Damage to the bed frame or hardware can stop the headboard from attaching properly. Cracks or bent parts cause problems.
Inspect the frame and hardware for damage. Replace broken parts or buy new bolts to fix the issue.
- Look for cracks, bends, or rust on the frame
- Check bolts and brackets for wear or breaks
- Replace damaged parts with matching hardware
- Use rust remover or paint to protect metal parts
Credit: homeyfad.com
Maintenance Tips For Stability
Keeping your headboard stable ensures a safe and comfortable bed. Regular maintenance helps prevent wobbling and damage.
Simple checks and repairs can make your headboard last longer and stay steady.
Regular Tightening
Check all screws and bolts that attach the headboard to the bed frame. Tighten them often to avoid looseness.
Use the right tools like a wrench or screwdriver to make sure connections are secure but not over-tightened.
Inspecting For Wear
Look closely at the headboard and frame for cracks, splits, or rust. These signs show the parts may weaken over time.
Check wood joints and metal brackets. Early spotting of damage helps you fix problems before they worsen.
Replacing Hardware
Replace old screws, bolts, or brackets if they show rust or wear. New hardware keeps the headboard firmly attached.
- Choose hardware that fits your bed frame type
- Use rust-resistant materials for longer life
- Follow the headboard instructions for proper replacement

Credit: www.reddit.com
Frequently Asked Questions
How Does A Headboard Attach To A Bed Frame?
A headboard typically attaches using bolts and brackets. These fasteners align with pre-drilled holes in the bed frame. This secure method ensures stability and prevents wobbling. Most metal and wooden bed frames support this attachment style for easy installation.
Can Headboards Fit All Bed Frame Types?
Not all headboards fit every bed frame. Compatibility depends on the frame’s design and bolt spacing. Adjustable brackets can help fit different sizes. Always check measurements and mounting options before purchasing a headboard for your bed frame.
What Tools Are Needed To Attach A Headboard?
Common tools include a wrench, screwdriver, and bolts. Some headboards come with mounting hardware. Using the right tools ensures a tight and safe connection. Avoid over-tightening bolts to prevent damage to the frame or headboard.
Is It Possible To Attach A Headboard Without Screws?
Yes, some headboards attach using clamps or adhesive strips. These methods suit temporary setups or non-drilling preferences. However, they may lack the stability of screw-mounted headboards. Clamps are ideal for metal frames, while adhesive works for light, decorative headboards.
Conclusion
Attaching a headboard to a bed frame is simple and clear. Most headboards connect using bolts or brackets. You only need basic tools like a wrench or screwdriver. Always check that the headboard fits your bed frame size. Tighten all screws securely to avoid wobbling.
A well-attached headboard adds style and comfort to your bedroom. Try it yourself and enjoy a better bed setup. No need to hire help or buy special parts. Just follow the steps, and you are done.