
Is your beautiful veneer furniture showing signs of wear? Maybe a chip, crack, or peeling layer has caught your eye, and you’re wondering if it’s worth fixing.
The good news is, you don’t have to replace your cherished piece or spend a fortune on professionals. With a few simple steps, you can bring your veneer furniture back to life right at home. Keep reading, and you’ll discover easy, effective ways to repair your furniture so it looks as good as new—and you’ll feel proud doing it yourself.
Common Veneer Damage Types
Veneer furniture looks elegant but can get damaged over time. Knowing common damage types helps you fix them properly.
Some damage is easy to repair at home. Others may need special care. Here are common veneer problems you might see.
Peeling And Lifting
Peeling happens when the veneer separates from the wood underneath. This can cause edges to lift or curl up.
Heat, moisture, or glue failure often cause peeling. Fix it quickly to stop more damage.
- Gently lift the veneer to check for glue underneath.
- Apply wood glue under the lifted area.
- Press the veneer down with a clamp or heavy books.
- Let it dry fully before using the furniture.
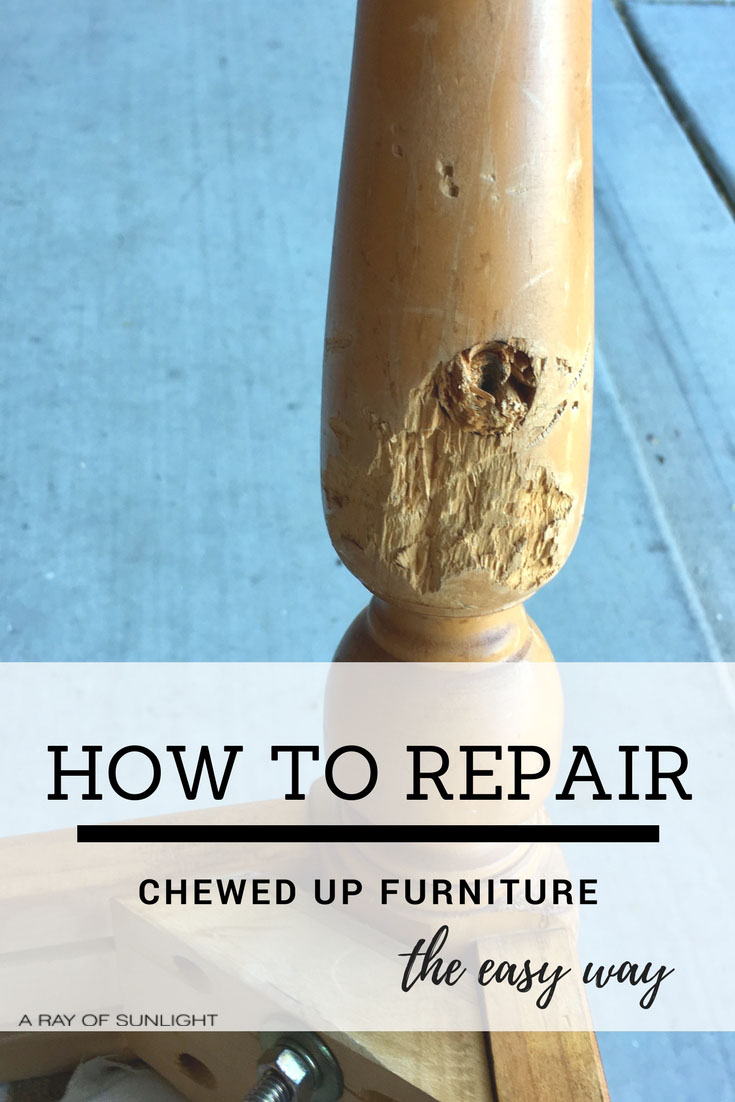
Chips And Cracks
Chips are small pieces that break off the veneer surface. Cracks are thin splits that go through the veneer.
These damages happen from bumps, drops, or age. They affect the look and can worsen if ignored.
- Use wood filler or putty to fill chips and cracks.
- Match the filler color to the veneer for a good look.
- Sand the area gently after it dries.
- Apply a finish or varnish to protect the repair.
Water Stains
Water stains appear as white or dark spots on the veneer. They form when moisture sits on the surface too long.
These stains can damage the finish and sometimes the wood beneath. Quick action can reduce the damage.
- Blot wet spots immediately with a dry cloth.
- Use a soft cloth and mild cleaner for light stains.
- For white rings, try rubbing with a small amount of toothpaste.
- Polish the surface after cleaning to restore shine.
Scratches And Scuffs
Scratches are surface marks that remove finish or wood. Scuffs are dull marks from rubbing or dragging objects.
These damages reduce the beauty of veneer furniture. Many scratches and scuffs can be fixed at home easily.
- Clean the area with a soft cloth before repair.
- Use a wax stick or furniture marker to fill scratches.
- Buff gently with a soft cloth to blend repairs.
- Apply polish or finish to protect the surface.

Credit: www.youtube.com
Essential Tools And Materials
Repairing veneer furniture needs the right tools and materials. Using proper items helps fix damage well.
This guide covers key tools that make veneer repair easier and more effective.
Adhesives And Glues
Strong adhesives keep veneer pieces in place. They bond wood and fix cracks or loose spots.
Use glue made for wood and veneer. Avoid glue that dries too hard or brittle.
- Wood glue (PVA) is good for most repairs
- Contact cement works for large veneer sheets
- Hide glue is traditional and easy to clean
- Epoxy glue is strong but hard to remove
Sandpaper And Scrapers
Sandpaper smooths edges and removes old glue. Scrapers help lift damaged veneer carefully.
Choose sandpaper with fine grits to avoid scratches. Use scrapers with a sharp, thin blade.
- Use 120-220 grit sandpaper for finishing
- Coarse sandpaper (60-80 grit) removes rough spots
- Plastic or metal scrapers remove loose veneer
- Be gentle to avoid damaging the wood
Clamps And Weights
Clamps hold veneer in place while glue dries. Weights apply even pressure on flat surfaces.
Use the right size clamps to avoid marks. Weights help with delicate or uneven areas.
- C-bar or spring clamps work well for edges
- Flat weights like books or boards spread pressure
- Padded clamps protect veneer from dents
- Check pressure often to prevent damage
Finishing Products
Finishing products restore the look of veneer after repairs. They protect and add shine.
Choose finishes that match the original furniture style and wood type.
- Wood stain matches color of existing veneer
- Shellac and varnish add a hard protective layer
- Wax polish enhances shine and smoothness
- Touch-up markers fix small scratches and spots
Preparing The Surface
Repairing veneer furniture starts with preparing the surface. Clean and dry the area well. This helps the repair materials stick better.
Remove any loose veneer and smooth rough spots. This creates a good base for fixing the damaged parts.
Cleaning And Drying
Start by wiping the veneer with a soft cloth. Use mild soap and water to remove dirt and grease. Avoid soaking the wood.
After cleaning, let the furniture dry completely. Moisture can stop glue or filler from sticking well.
Removing Loose Veneer
Check for any loose or peeling veneer pieces. Carefully lift them using a putty knife or your fingers. Avoid breaking the veneer.
Remove all loose parts to prevent bumps or gaps later. Clean the area underneath to remove old glue or debris.
Sanding Rough Areas
Lightly sand the damaged area with fine-grit sandpaper. This smooths rough edges and removes old glue.
Sand gently to avoid damaging the surrounding veneer. Wipe away dust before applying any repair material.
Fixing Peeling Veneer
Peeling veneer on furniture looks bad and can get worse over time. Fixing it early keeps your furniture strong and nice.
Use simple tools and glue to reattach the loose veneer. Follow these steps to repair the peeling parts carefully.
Applying Glue
Lift the peeling veneer gently. Use a small brush or toothpick to apply wood glue under the veneer. Make sure the glue spreads evenly.
Press the veneer back in place slowly. Wipe off any extra glue that comes out to keep the surface clean.
Clamping And Drying
Put a piece of wax paper on the glued veneer. Place a clamp or a heavy object on top to hold it tight. This stops the veneer from moving.
- Use a soft cloth between clamp and veneer
- Keep the clamp tight but not too strong
- Let it dry for at least 24 hours
Do not remove the clamp before the glue dries fully. This helps the veneer stick well and avoid new peeling.
Sanding Edges
After the glue is dry, sand the edges where the veneer meets the furniture. Use fine-grit sandpaper for a smooth finish.
Sanding removes glue residue and makes the surface even. Sand gently to avoid damaging the veneer or wood underneath.
Repairing Chips And Cracks
Veneer furniture can get chips and cracks over time. Fixing these damages helps keep your furniture looking good.
This guide will show simple ways to repair chips and cracks in veneer. You can do it yourself with a few tools.
Filling Gaps
Start by cleaning the damaged area. Remove any loose pieces or dust from the chip or crack.
Use wood filler or putty to fill the gaps. Press it in firmly so it fills all empty spaces.
- Pick a filler that matches your veneer type
- Apply with a small putty knife or plastic scraper
- Fill slightly above the surface for sanding later
Smoothing Surfaces
After the filler dries, sand the area smooth. Use fine-grit sandpaper to avoid damage.
Sanding removes extra filler and blends the repair with the furniture surface. Take your time for a smooth finish.
- Sand gently along the grain of the veneer
- Check often to avoid sanding through the veneer
- Wipe dust off with a clean cloth
Matching Color
Color matching makes the repair less visible. Use stain or paint that matches your furniture color.
Apply color in thin layers. Let each layer dry before adding more for a better match.
- Test color on a hidden spot first
- Use a small brush for detailed work
- Seal with clear varnish if needed

Credit: kraycustomrefinish.com
Eliminating Water Stains
Water stains on veneer furniture can ruin its look. These marks happen when moisture gets under the finish. You can fix this with simple home methods.
Fixing water stains early helps protect your furniture. Use gentle techniques to clean without causing more damage.
Using Heat Methods
Heat can help remove white water stains on veneer furniture. The heat evaporates trapped moisture under the finish.
Use an iron or hair dryer on low settings. Place a cloth between the heat and the surface. Heat for a few seconds at a time and check often.
- Set iron to low or medium heat
- Cover stain with a clean cloth
- Press iron gently for 10-15 seconds
- Lift cloth and check the stain
- Repeat if needed but avoid overheating
Applying Stain Removers
Some stains need stain removers to clean them. Use products made for wood or veneer surfaces to avoid damage.
Test the remover on a hidden area first. Apply a small amount on a soft cloth and rub gently on the stain. Wipe clean with a dry cloth.
- Choose wood-safe stain remover
- Test on an unseen spot
- Apply gently with a soft cloth
- Rub in small circles
- Wipe off residue with dry cloth
Refinishing Affected Areas
If stains do not come off, refinishing may help. This involves sanding and reapplying a finish layer.
Lightly sand the stained area with fine sandpaper. Clean dust and apply a matching veneer finish or varnish. Let it dry fully before use.
- Use fine-grit sandpaper (220 grit)
- Sand gently on the stain
- Remove dust with a soft cloth
- Apply veneer finish or varnish evenly
- Allow to dry completely
Restoring Scratches And Scuffs
Veneer furniture often gets scratches and scuffs from daily use. Fixing these marks keeps your furniture looking nice. You can repair small damages at home with simple tools.
This guide shows easy ways to restore your veneer furniture step by step. Use light sanding, touch-up markers, and sealing to make scratches less visible.
Light Sanding
Start by sanding the scratched area gently. Use very fine sandpaper to avoid removing too much veneer. Sanding smooths out rough spots and prepares the surface for repairs.
Move the sandpaper in the direction of the wood grain. Stop sanding as soon as the scratch feels even with the rest of the surface.
Applying Touch-up Markers
Touch-up markers come in colors that match wood finishes. Choose a marker close to your furniture’s color. These markers help hide scratches and blend them with the surrounding veneer.
Apply the marker carefully along the scratch line. Let it dry, then add more layers if needed. Wipe off any extra marker with a soft cloth.
Sealing The Finish
After fixing scratches, seal the area to protect it. Use a clear finish like varnish or lacquer that matches your furniture’s original coating. This step keeps repairs lasting longer.
Apply a thin coat with a brush or cloth. Let it dry completely before using the furniture again. Sealing also restores the shine and smooth feel of the veneer.
Credit: arayofsunlight.com
Preventing Future Damage
Taking care of veneer furniture helps it last longer. Small actions can stop damage from happening again.
Proper care keeps the veneer looking nice and protects your investment over time.
Proper Cleaning Techniques
Clean veneer furniture gently to avoid scratches. Use soft cloths and mild cleaners made for wood.
Never use harsh chemicals or abrasive sponges. They can wear down the finish and damage the surface.
- Dust regularly with a soft, dry cloth
- Use a damp cloth with a mild soap solution for stains
- Dry the surface immediately after cleaning
- Avoid sprays with ammonia or bleach
Using Protective Covers
Protective covers shield veneer from spills and scratches. Use covers on tables and chairs during activities.
Covers also block sunlight that can fade the wood. Choose breathable fabrics to prevent moisture buildup.
- Use tablecloths or placemats to stop heat and scratches
- Cover furniture when not in use for long periods
- Pick materials that allow air to pass through
- Remove covers regularly to clean underneath
Maintaining Humidity Levels
Veneer wood reacts to humidity changes. Keep the room’s humidity steady to avoid warping or cracking.
Use a humidifier or dehumidifier to control moisture. Aim for 40-60% humidity for best results.
- Check humidity with a simple gauge
- Avoid placing furniture near heaters or air conditioners
- Ventilate rooms to reduce excess moisture
- Use plants or water trays to increase humidity if needed
Frequently Asked Questions
How To Fix Peeling Veneer?
To fix peeling veneer, gently lift the loose piece. Apply wood glue underneath and press firmly. Use a clamp or heavy object to hold it in place while drying. Sand the edges smoothly once the glue is dry. Finish with matching wood polish for a seamless look.
Can You Repair Water-damaged Veneer?
Yes, you can repair water-damaged veneer. First, dry the area thoroughly. Remove any warped or bubbled veneer carefully. Sand the surface smooth and apply wood glue to reattach loose pieces. Finish by sealing with a waterproof varnish to prevent future damage.
What Tools Are Needed For Veneer Repair?
For veneer repair, you'll need a utility knife, wood glue, sandpaper, clamps, and a putty knife. A matching wood stain or polish is also useful. These tools help in precise cutting, gluing, and finishing of the veneer for professional-looking results.
How To Fix Veneer Bubbles?
To fix veneer bubbles, carefully slit the bubble with a utility knife. Inject wood glue under the bubble using a syringe. Press down firmly and wipe off excess glue. Use a heavy object to weigh it down until the glue dries, ensuring a flat surface.
Conclusion
Repairing veneer furniture is easier than it seems. Small cracks and chips do not need a full replacement. Use simple tools and glue to fix damaged areas. Sand carefully to make surfaces smooth again. A fresh finish can bring back the shine.
Take your time and be patient with each step. This way, your furniture will look good and last longer. Keep these tips handy for future repairs. You can save money and enjoy your furniture more.


